
Feeding Chickpeas and Legumes to Chickens: What’s Safe, What’s Not
Published on: August 7, 2026 | Last Updated: August 7, 2026
Written By: Caroline Mae Turner
Howdy y’all, welcome back to the barn. If you’ve been eyeing that bag of dried beans in the pantry and wondering if your flock can share, I’ve got your farmer’s fix right here: cooked chickpeas and most legumes are a fantastic, protein-rich treat, but you must never, ever feed them to your chickens raw or undercooked.
What you’ll need:
- Dried chickpeas, lentils, or peas from your pantry.
- A large stockpot for boiling.
- A little bit of your time for soaking and cooking.
We’ll sort through the legumes in your feed bin so you can use them safely and get back to the rest of your homestead chores.
The Short Answer on Chickpeas and Chicken Safety
Well, y’all, let’s get straight to the point. Can chickens eat chickpeas? Yes, but only after they’re cooked. Raw chickpeas hold lectins and phytates, compounds that can bind nutrients and irritate your bird’s gut. I never toss raw legumes to my flock after seeing a few hens get sluggish from sampled garden beans. Cooking breaks down these anti-nutrients, making the peas safe and digestible. So, for chickens, cooked beans can fit as a safe legume when given in small amounts, with careful attention to frequency.
Canned chickpeas work in a pinch, but rinse them thoroughly to wash away excess salt. Proper preparation turns a risky item into a wholesome, occasional treat your chickens will cluck for. Keep portions small, about a tablespoon per bird mixed into their regular feed, especially since chickens should avoid salty foods.
Why Consider Legumes? Nutritional Perks for Your Flock
Scratch grains are fine, but legumes are a thrifty homesteader’s secret for balanced nutrition. They’re a sustainable, cost-effective way to enhance your feed regimen. Adding cooked legumes like chickpeas, lentils, or black-eyed peas stretches your feed bag and boosts overall flock health. I’ve relied on them for years to supplement my layers and meat birds.
Legumes offer a dense nutrient profile that mimics the varied diet chickens forage naturally. Beyond their standard feed, chickens also eat greens, seeds, and safe kitchen scraps as supplemental foods and treats. This helps broaden their nutrient intake and supports natural foraging behavior. This isn’t just filler food; it’s a strategic choice for responsible animal stewardship.
Protein Power: Fueling Feathers and Eggs
Protein is the cornerstone of good poultry husbandry. Legumes are powerhouses here, with chickpeas packing 19 to 25 percent crude protein. That plant-based protein directly supports egg formation, muscle development, and critical feather regrowth during molt. When my hens are shedding feathers, I always stir cooked, mashed chickpeas into their mash.
Here’s how that protein translates in the coop:
- Egg Production: Laying hens require 16-18% dietary protein. Legume treats help meet this, leading to more consistent egg output.
- Feather Quality: Molting can demand up to 20% more protein. Legumes provide the amino acids needed for strong, glossy plumage.
- Overall Vigor: Growing pullets and active roosters use protein for energy and maintaining body condition.
A simple mix of cooked legumes and grains gives your birds a complete protein profile without always relying on expensive commercial feeds.
Beyond Protein: Vitamins and Minerals in the Mix
While protein gets the glory, the vitamin and mineral content in legumes is just as valuable. Chickpeas are rich in B-vitamins like folate and B6. These B-vitamins act like a tune-up for your chicken’s metabolism, keeping their energy levels steady throughout the day. Beyond chickpeas, greens like green beans for poultry diet also fit into a balanced feeding plan for chickens and ducks. They offer fiber and minerals that support healthy foraging and overall well-being. I reckon birds with access to legumes scratch and explore with more purpose.
The mineral lineup is impressive and targets specific health needs:
- Iron: Carries oxygen in the blood, preventing anemia and lethargy in your flock.
- Zinc: Bolsters immune response and aids in skin and feather integrity, reducing issues like bumblefoot.
- Magnesium: Supports nerve function and bone strength, which is fundamental for active, free-ranging birds.
- Phosphorus: Works hand-in-hand with calcium to build resilient eggshells and maintain skeletal health.
Feeding cooked legumes delivers a broad spectrum of nutrients that promote resilience from the inside out. It’s a natural, whole-food approach to husbandry I swear by.
The Raw Truth: Understanding the Dangers
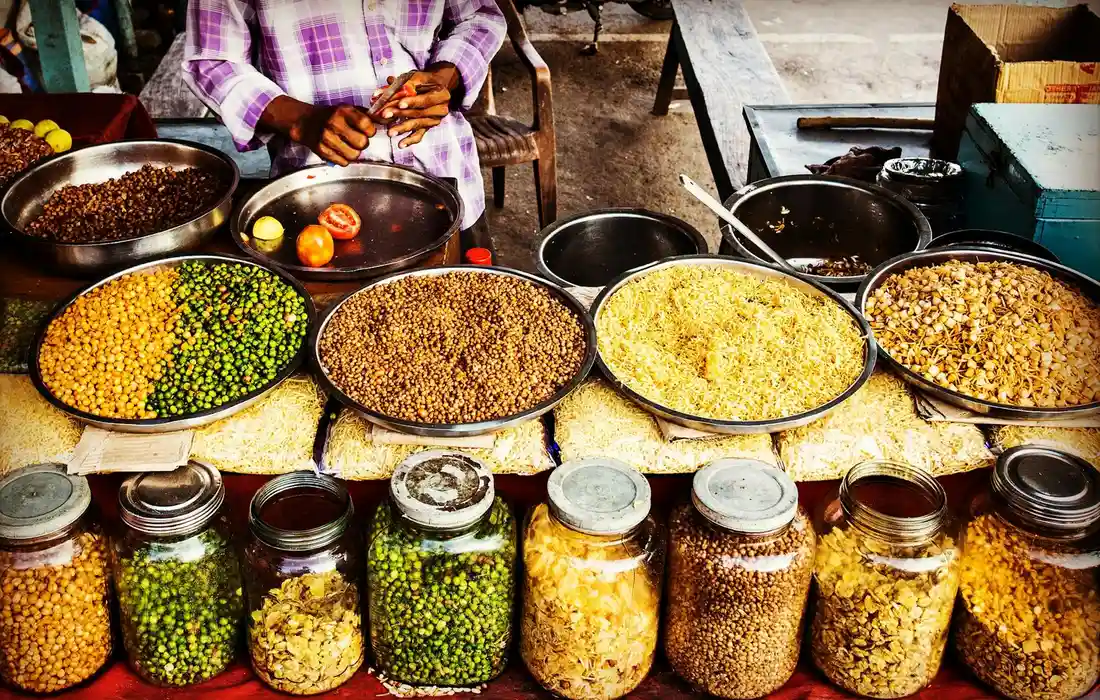
Lectins and Other Anti-Nutrients: A Simple Explanation
Now, let’s talk plain about why you can’t just toss raw chickpeas or beans to your chickens. Those legumes come armed with natural defenses called lectins and phytates. Think of lectins like tiny burrs that stick to your hen’s gut, causing irritation and blocking her from absorbing all the good from her feed. I learned this lesson early when a sack of dry black beans tipped over in the barn. My curious Barred Rocks had a field day, and by evening, they were hunched and miserable-a sight I don’t care to see again.
Phytates are another hitch. They bind up minerals like zinc and iron, making ’em useless to your bird. Feeding raw legumes is essentially wasting your feed dollar and asking for poor shell quality and sluggish birds. Proper preparation turns these problem plants into a protein-packed blessing instead of a bellyache.
Mold and Aflatoxins: A Storage Safety Hazard
Danger ain’t always in the eating; sometimes it’s in the keeping. Legumes stored in damp warmth can grow mold, and some molds produce deadly aflatoxins. Aflatoxin poisoning creeps up slow, damaging livers and weakening your flock’s whole system without a clear sign until it’s too late. I keep my feed room drier than a sun-bleached bone after losing two good layers to a contaminated batch of peanuts years back.
Your nose and eyes are your best tools here. Always store chickpeas and all legumes in airtight containers, off concrete floors, and in a spot with good air circulation. Before you even think about soaking, give them a good look. Toss anything with visible mold, discoloration, or a musty, off smell.
- Use food-grade buckets with gamma seals.
- Keep storage areas below 60% humidity if you can.
- Buy from sources with high turnover to ensure freshness.
From Bag to Beak: Proper Prep for Perfectly Safe Legumes
Step 1: The Long Soak
Soaking is where the magic starts, y’all. It kicks off the process of deactivating those anti-nutrients we just discussed. I cover my legumes with at least three inches of cool, clean water and let them baptize overnight, for a good 12 to 24 hours. For larger beans like chickpeas or kidney beans, I lean toward the full day. You’ll see the water get cloudy-that’s the phytates and other compounds leaching out.
Don’t cut corners here. After the soak, you must drain and rinse those legumes thoroughly with fresh water. I pour mine into a big colander and let the spray run for a solid minute. That soak water goes right to the compost, not down the drain where it might clog.
Step 2: Cooking It Through
Soaking alone isn’t enough; heat finishes the job. Cooking destroys the lectins and softens the legumes so your hens can digest them easily. You need to boil those soaked beans until they are utterly tender, with no firmness at the center. For chickpeas, that means a gentle simmer for 60 to 90 minutes. For smaller lentils, 20 to 30 minutes usually does it.
Let them cool completely before serving. I spread cooked legumes on a sheet pan to cool fast, then store them in the fridge for up to four days. You can cook a big batch and freeze portions, too. My pressure cooker is a homestead hero for this, cutting the cooking time for chickpeas down to about 15 minutes once it’s up to pressure.
A Simple Homemade Legume Scratch Mix Recipe
Here’s a favorite from my kitchen. This mix is a fantastic, high-protein supplement-great for tossing in the run as a treat or mixing into their mash during molt. This recipe makes about 5 quarts of scratch, perfect for a small flock for a week of special treats.
Ingredients:
- 3 cups cooked and cooled chickpeas (garbanzo beans)
- 2 cups cooked and cooled green or brown lentils
- 4 cups cracked corn
- 2 cups whole oats
- 1 cup black oil sunflower seeds
- 1/2 cup crushed, dried eggshells (for calcium)
How to Make It:
- Ensure all your cooked legumes are completely cooled and dry to the touch.
- In a very large bowl or clean feed tub, gently combine all the ingredients.
- Store the mix in an airtight container in a cool, dark place.
- Feed sparingly-no more than a handful per bird per day, as a supplement to their balanced layer feed.
Chickpeas vs. The Legume Family: A Flock Keeper’s Comparison
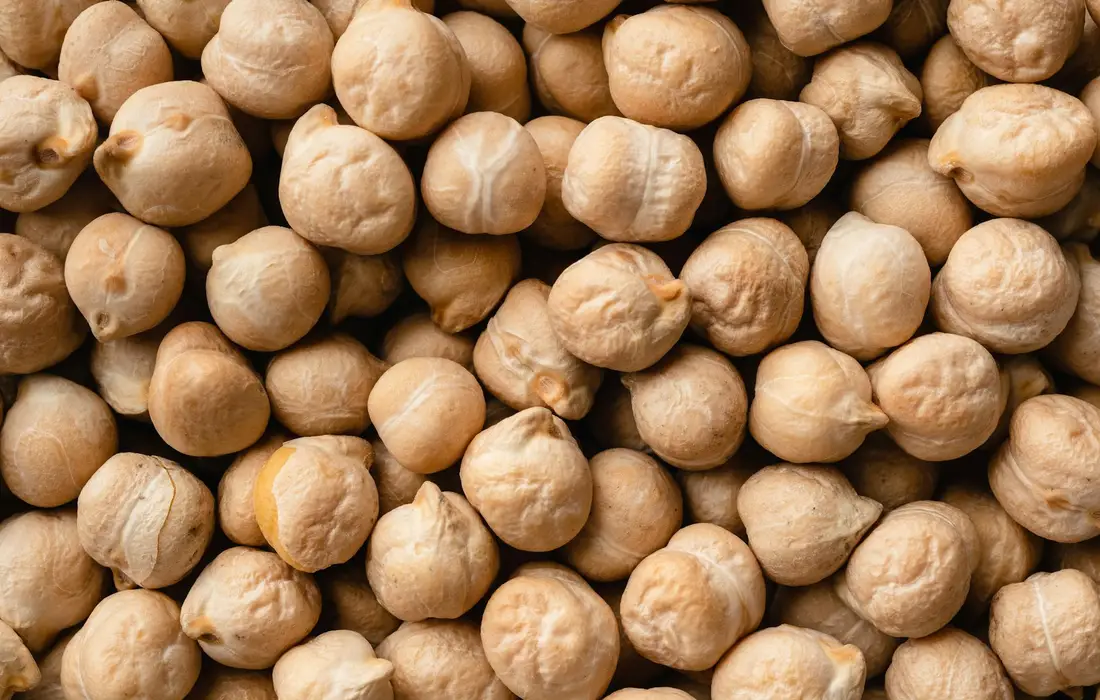
Now, hold up. Before you start dumpin’ just any ol’ bean into the scratch bowl, let’s have a neighborly chat about the whole legume lineup. Chickpeas are just one member of a mighty big family, and not all of ’em play nice with poultry in the same way. I’ve spent many an afternoon in the garden and kitchen figurin’ this out, so let me save you some trial and error.
Chickpeas, or Garbanzo beans, are your sturdy, reliable cousin. They’re dense, hold their shape, and pack a solid protein punch. Their larger size means they require a good, thorough cooking to become digestible, making them a bit more of a planned treat than a daily toss-in. I often cook up a big pot on a Sunday to have ready for the week.
Then you’ve got your common beans-kidney, black, pinto, navy. Here’s the rule my granddaddy taught me that’s never failed: If it’s a bean you’d soak overnight for your own supper, it absolutely must be fully cooked for your chickens, as they contain higher levels of those troublesome lectins. A raw kidney bean is a hard no, but a soft, cooked one is a fine occasional mixer, unlike butter beans and other safe beans for chickens.
The Lentil Advantage: A Quick-Cook Option
This is where lentils become a homesteader’s secret weapon. They’re the speedy little sibling of the legume clan. Lentils, whether brown, green, or red, have the distinct advantage of cooking quickly without any pre-soaking, which is a blessing on a busy farm day. Their smaller size breaks down easier, and my hens seem to gobble ’em up with great enthusiasm.
I keep a jar of cooked brown lentils in my fridge. When I’m mixing up a warm morning mash in the winter, or just want to add a protein boost to their treats, a scoop of lentils is my go-to. They blend seamlessly into moist mashes, making them an excellent choice for younger birds or older hens who might find chickpeas a tad too cumbersome. From a thriftiness perspective, they’re often the most affordable legume on the shelf, too.
| Legume Type | Preparation Must-Do | Best For | My Barnyard Notes |
|---|---|---|---|
| Chickpeas (Garbanzos) | Long soak & full cook until very soft. | Protein-rich standalone treat. | A winter favorite in a warm mash; hens love ’em mashed. |
| Common Dried Beans | Absolute must soak and cook thoroughly. | Occasional diet mixer; never raw. | I mix a few cooked black beans into their scratch for variety. |
| Lentils | Rinse & cook; no soak needed. | Quick protein boost, moist mashes, everyday use. | My most-used legume. The convenience can’t be beat for daily stewardship. |
| Split Peas | Rinse & cook; no soak needed. | Soup-style mashes, great for hydration. | Cook down to a mush that’s perfect for blending with grains. |
Feeding in Moderation: Guidelines for a Balanced Diet
Here’s the heart of the matter, friends. Even the best-cooked chickpea is not chicken feed. It’s a supplement, a treat, a protein booster. The cornerstone of your flock’s health must always be a complete, nutritionally balanced commercial or carefully formulated homemade feed. Think of legumes like the cornbread beside your chili-wonderful and satisfying, but not the whole meal itself.
So, what does “moderation” look like in the coop? I follow a simple ratio. Legumes and other cooked treats should never make up more than 10% of your birds’ total daily dietary intake. For my small flock of ten layers, a scant cup of cooked chickpeas or lentils scattered across the whole group in the afternoon is a plenty. It’s enough to spark a happy forage, not enough to fill them up and make ’em skip their layer pellets.
Gradual Introduction and Bird Monitoring
You wouldn’t sit down to a giant bowl of chili if you’d never had a bean before, would you? Your hens need the same courtesy. Introducing any new food slowly is a cardinal rule of good husbandry.
- Start Small: On the first day, offer just a tablespoon of fully cooked, cooled legumes to the entire flock. Scatter them wide so no one bird hogs the lot.
- Watch Close: For the next 24 hours, keep an eye on your birds. You’re looking for normal activity, normal droppings, and normal enthusiasm for their regular feed.
- Increase Slowly: If all looks well, you can offer a slightly larger amount every other day for a week until you reach that small “treat portion” size.
- Know the Signs: If you see lethargy, loose droppings, or a crop that feels overly full and doughy in the morning, stop the treats immediately. Your number one job is observer; the birds will tell you if something disagrees with them, but you have to be listenin’.
This process isn’t just about safety-it lets you see which legumes your flock prefers. My Speckled Sussex would knock you over for a lentil, but they’ll leave a chickpea for last. Every flock has its own personality at the dinner table, and it’s our duty to learn it.
Storing Your Legume Supply: Keeping it Safe and Thrifty
Now, I’ve seen folks go to great lengths to source good feed, only to lose it all to a damp corner or a hungry mouse. Proper storage is where your thriftiness and care truly shine. Storing legumes right protects your investment and ensures your flock gets safe, nutritious feed every time you scoop it out.
Know Your Adversaries: What Spools Good Feed
In my decades on the farm, I’ve battled the same four villains: moisture, insects, rodents, and heat. A batch of lentils I stored in a shed once fermented from humidity, and nothing will sour your mood faster. Identifying these threats is the first step to outsmarting them and keeping your supply secure.
- Moisture: The arch-nemesis. It invites mold and dangerous mycotoxins. Your storage must be drier than a July creek bed.
- Insects: Weevils and bean moths can hatch from eggs laid before harvest. An infested bag is a total loss.
- Rodents: Mice and rats will gnaw through cardboard and plastic for a high-protein meal. They’re wasteful and unclean.
- Heat & Light: Warmth accelerates the breakdown of oils and nutrients. Think of it as turning your feed stale before its time.
Picking the Right Container: A Homesteader’s Arsenal
I’ve used everything from coffee cans to repurposed whiskey barrels. Your goal is an airtight seal that bugs and varmints can’t breach. Choosing a rugged container is a one-time cost that pays for itself by preventing spoilage year after year.
- Food-Grade Plastic Buckets: With gamma-seal lids, these are my go-to. They’re affordable, stackable, and hold about 25 pounds of legumes. Toss in a dried bay leaf as a natural insect repellent.
- Galvanized Metal Cans: More expensive, but rodents can’t chew through them. Perfect for barn storage where mice roam. Just ensure the lid fits snug.
- Glass Jars for Small Batches: Ideal for kitchen scraps or sprouting. You can see problems instantly, but keep them in a cupboard to block light.
- Mylar Bags with Oxygen Absorbers: For long-term storage of seeds or planting beans, this method removes air and seals out moisture for years.
Creating the Ideal Storage Environment
Where you put those containers matters just as much. The best spot is cool, dark, and has steady air circulation. My old milk house, with its concrete floor and thick walls, serves this purpose perfectly. A consistent temperature between 50°F and 60°F will preserve your legumes’ quality for over a year.
- Elevate Everything: Never set containers directly on a dirt or concrete floor. Use wooden pallets or shelves to create a buffer against dampness.
- Seek Darkness: Sunlight degrades vitamins and can warm containers. A pantry, interior closet, or basement corner is ideal.
- Mind the Humidity: If your storage area feels muggy, a low-cost moisture absorber like silica gel or even dry rice in a cloth bag can help.
The Frugal Art of Bulk Buying
Buying a 50-pound sack of chickpeas can cut your cost in half, but only if you can use it. I coordinate with a neighboring farm to split bulk orders. Bulk purchasing demands a plan; otherwise, you’re just buying future waste.
- Practice Rigid Rotation: Always use the oldest stock first. Mark every container with the purchase date in permanent marker.
- Match Quantity to Your Flock: A small laying flock of 10 hens might only need 20 pounds of legumes per season. Buy accordingly to avoid stale feed.
- Consider a Community Buy: Get a few local homesteaders together to order a larger quantity from a feed mill. Everyone saves, and nothing goes to waste.
A Simple Maintenance Routine
Set a monthly date to check your stores. I do mine on the first, right after I check the coop hinges. Look for condensation, insect webbing, or any unusual odor. This five-minute habit is the cornerstone of sustainable stewardship, catching issues while they’re still small and manageable.
If you find a problem, act fast. For insects, freeze the entire container for at least 72 hours to kill all life stages. For dampness, move your supply to a drier location and check the integrity of your seals. This attentive care respects the value of the feed and the health of the animals that depend on it.
Closing Questions: Your Practical Legume Guide
Can I use canned chickpeas instead of cooking dried ones?
Yes, you can use canned chickpeas as a convenient alternative. Be sure to rinse them thoroughly under water to remove excess sodium from the canning brine before serving them to your flock. They are already fully cooked, making them a safe and quick option for a protein treat.
How much cooked chickpea or legume treat should I give my chickens?
Legumes should be a supplement, not a main course. A good rule is to limit all treats, including cooked legumes, to no more than 10% of their daily diet, which typically equates to about one tablespoon per bird per day. Always scatter treats to prevent bullying and ensure everyone gets a fair share.
Are there any other legumes that are safe or unsafe that I should know about?
Most common legumes like lentils, split peas and dried legumes for chickens are safe when cooked thoroughly. However, avoid raw or undercooked kidney beans, as they contain very high levels of lectins. Also, never feed any legumes that show signs of mold or have been stored improperly, due to the risk of aflatoxins.
Do I need to mash chickpeas for my chickens, or can they eat them whole?
Chickens can eat them whole once they are fully cooked and soft. However, mashing or roughly chopping larger chickpeas can make it easier for all birds to eat, especially younger pullets or older hens, and helps prevent any from gulping them down too quickly.
What do other chicken keepers say about feeding chickpeas?
On community forums like Reddit, many flock owners report their chickens love chickpeas as a high-protein treat, especially during molt. Common advice mirrors the article: emphasize that cooking is non-negotiable for safety, and most recommend mixing legumes with grains like corn or oats for a balanced scratch mix. The guide covers the safety aspects of feeding beans to chickens in detail.
Can I sprout chickpeas or lentils for my chickens instead of cooking them?
Yes, sprouting is an excellent alternative! The sprouting process naturally breaks down anti-nutrients like lectins and phytates, making the legumes safe and highly nutritious. Simply soak, rinse, and allow them to sprout for 2-3 days before feeding the entire sprout (seed, root, and shoot) to your eager flock.
Back to the Pasture
When it comes to feeding legumes, the rule is simple: never serve them raw. Proper cooking is the non-negotiable key that unlocks all the protein and makes every single bean or pea safe for your flock. Treat that pot of chickpeas or bucket of lentils like you would a fence line-make it sturdy, reliable, and without a single weak spot for trouble to get through. For chickens, lentils should be cooked and cooled before serving. A brief safety prep guide can walk you through proper portioning and serving timing.
I reckon I’ll head back out to the barn now. The evening feed is waiting, and there’s nothing quite like the sound of contented birds settling in for the night. I hope y’all feel confident to give these mighty legumes a try. Here’s to happy hens, thriving flocks, and the simple, good work of tending to them. Until next time, neighbor.
Further Reading & Sources
- CHICKPEAS IN POULTRY DIETS – Small and backyard poultry
- Raw Chickpea (Cicer arietinum L.) as a Substitute of Soybean Meal in Compound Feed for Broiler Chickens: Effects on Growth Performance, Lipid Metabolism, Fatty Acid Profile, Antioxidant Status, and Dietary Value of Muscles – PMC
- Effect of Raw Chickpea in the Broiler Chicken Diet on Intestinal Histomorphology and Intestinal Microbial Populations – PMC
Caroline Mae Turner is a lifelong farm girl raised on red clay, early mornings, and the sounds of a bustling barnyard. With hands-on experience caring for everything from stubborn goats to gentle dairy cows and mischievous pigs, Caroline shares practical, tried-and-true advice straight from the farm. Her goal is to help folks keep their animals healthy, well-fed, and living their best barnyard life. Whether you're wrangling chickens or bottle-feeding a baby goat, Caroline brings a warm Southern touch and plenty of real-world know-how to every bucket in the barn.
Diet Requirements